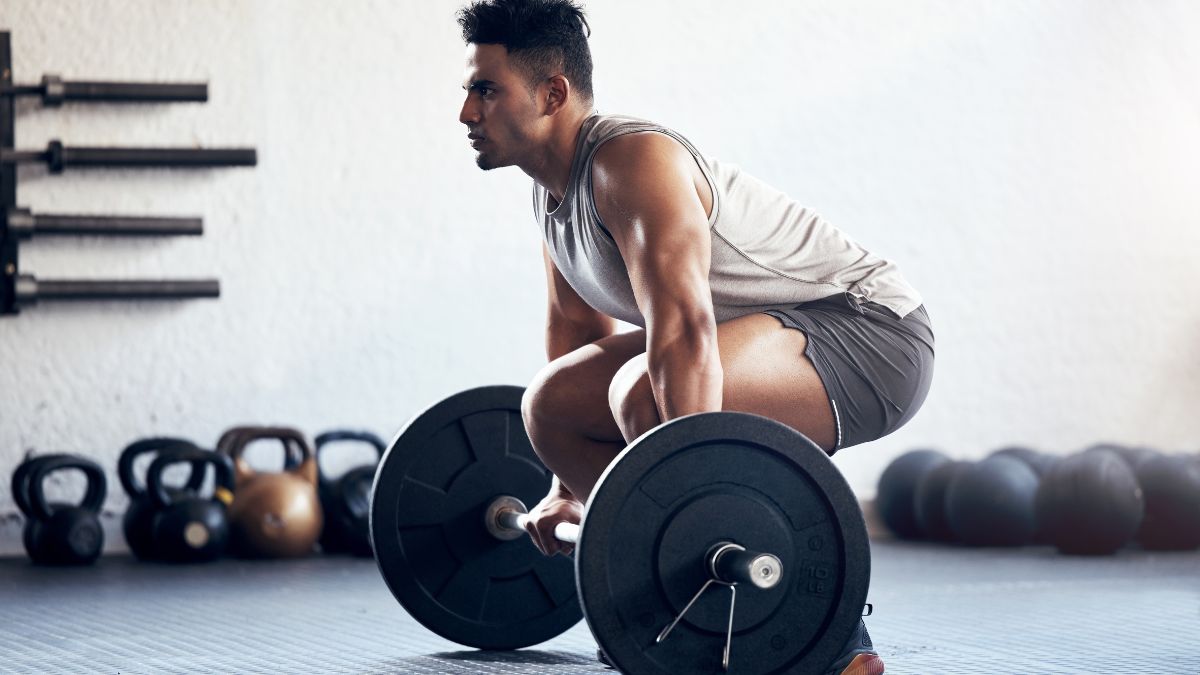
To be blunt, deadlifting is awesome. Once you get hooked, you are hooked for life. It is arguably the best test of full-body strength, and the deadlift will never lie to you. You can either grip it and rip it from the floor… or not.
Getting better and stronger at the deadlift is a lifelong pursuit for many lifters who dive down the rabbit hole trying to lift more weight.
However, mistakes can happen when you push the boundaries to improve your deadlifting strength, which is perfectly okay. The trick here is to recognize these mistakes and fix them ASAP, so you can improve safely and, hopefully, not end up on the physical therapist’s table.
Here are 12 of the most common deadlifting mistakes to watch out for, so you can continue being strong and safe.
Common Deadlifting Mistakes
Common Stance Mistakes
Your feet act as your support base, and ensuring correct foot placement goes a long way in shoring up your pull.
Too Much Heel Emphasis
The heart of the deadlift is the hip hinge movement, but some lifters overemphasize rocking back on the heels to attempt a better hinge. You should feel your heel solidly, but feeling your whole foot on the ground is more efficient. Driving too much through your heels may result in a loss of balance during the pull.
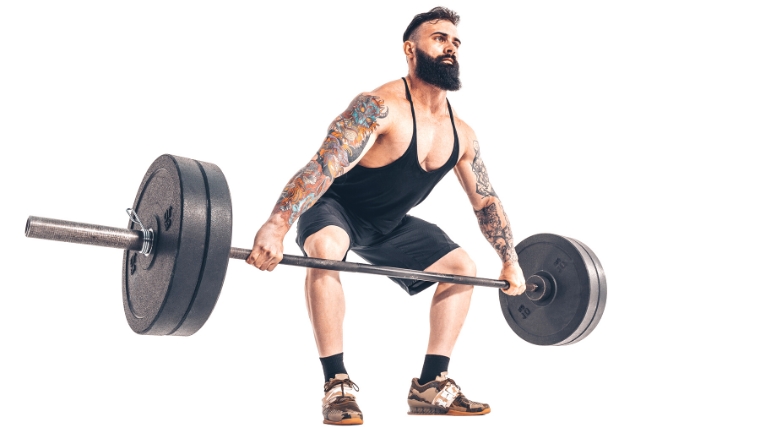
The Fix: Feel your whole foot on the floor before you begin lifting the weight. When hinging down, first make sure you feel your weight shifting back onto your heels. Next, feel your big toe by pressing it into the floor. Doing so ensures you will use your whole foot when you pull.
Too Much Toe Emphasis
Similar to putting too much emphasis on your heels, sometimes you may feel like you are being pulled onto your toes when deadlifting. This goes hand in hand with excessive knee flexion (squatting too much) in your setup. This mistake may stop you in your tracks and prevent you from lifting any serious weight off the ground.
The Fix: Similar to the solution for the heel issue, you need to feel your heel and your big toe before you pull, and you need to ensure you feel them throughout the entire set. Start with the barbell over the middle of your feet during your initial setup, which will put your body in a better overall position.
Your Feet Rotating While Pulling
When and if your feet turn outward during your pull, you can often correct this error during your setup. This rotating can happen when your body tries to “find space” while putting force into the ground. It can increase strain on your ankle and knee joints while decreasing power output.
The Fix: Spend time finding the best stance for you whether that’s conventional (feet roughly shoulder-width), sumo (feet well-beyond shoulder-width), or somewhere in between. Setting your feet slightly outward, instead of having them pointed straight ahead, can give your knees somewhere to go during your pull and works well for most lifters.
Common Hip Mistakes
The hip position is critical for a safer pull. If your hips are not correctly placed, say hello to eventual lower back issues. The deadlift is a hip hinge, after all. Getting your hips in the right position is crucial.
Your Hips Are Set Up Too Low
When trying to get into a good hinge position, you may find yourself setting your hips too low at the start of the deadlift. It may help you brace, but sitting down too much doesn’t allow you to “wedge” yourself into position or pull the slack out of the bar — two important technique tips for a more efficient deadlift.
When your hip hinge is compromised from low hips, your shoulders end up behind the barbell which is a weak position to pull from.
The Fix: Start with a soft bend in your knees before hinging down to grip the barbell. Pay attention to feeling your hip position. Ensure that your shoulders are slightly higher than your hips when setting up. If you’re not feeling your hamstrings engage, something is probably off and you should restart your positioning.
Your Hips Are Set Up Too High
Almost the opposite of the previous mistake, but equally as disruptive, a high hip position turns the deadlift into a pure hinge — like a stiff-legged deadlift. Although the deadlift is a hinge movement, the bend in your knees brings your quadriceps into the equation, which helps the initial pull off the floor.
The Fix: Make sure your shoulders are only slightly higher than your hips, not significantly higher. Use some knee bend to get into the starting position. Before lifting the weight, run a quick spot-check in the mirror or ask your lifting buddy to tell you what’s what.
Common Grip Mistake
If you cannot grip it, you cannot rip it. Grip strength is a common weak point and it pays to strengthen your grip by any means possible. Your grip is mostly a personal preference, but it’s best to have a shoulder-width grip for most deadlift variations. Whether you go with overhand, mixed (one overhand and one underhand), or hook grip (grabbing your thumb alongside the bar) is ultimately up to you.
Helicopter Deadlift
If you do use a mixed grip but your hands are set in a poor position, the barbell may twist and rotate while reaching lockout. This could be potentially torque your spine and end your deadlift quickly. It’s vital to have your hands and shoulders in the correct position before pulling, especially when using a mixed or “over/under” grip.
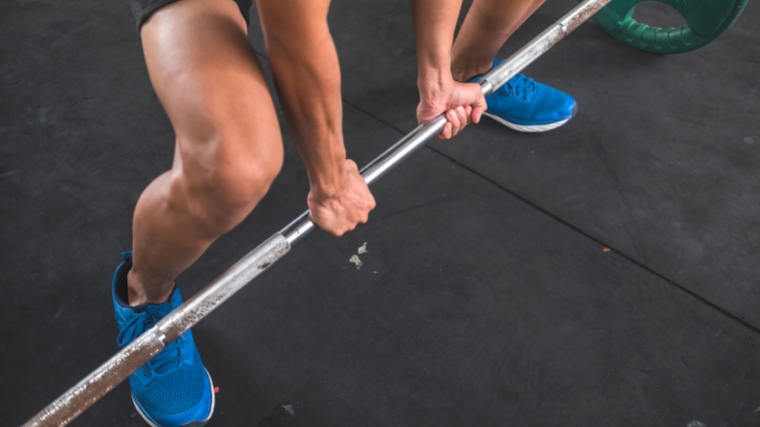
The Fix: Ensure your shoulder mobility allows you to perform a mixed grip properly. Your “underhand” arm will need to maintain external shoulder rotation — the palm-up position — throughout the entire set. For safety and top performance, go through a few shoulder mobility drills before deadlifting with a mixed grip.
Common Performance Mistakes
Here are a few of the most common actual technique and performance mistakes that can be holding you back and putting you at risk of injury.
Hips Coming Up Too Early
This is sometimes referred to as the “stripper deadlift” and is usually a result of weaker quads or a lack of upper back engagement. If your hips come up before the bar moves, what began as a standard deadlift immediately turns into an awkward and overloaded stiff-leg deadlift. It is only a matter of time before your lower back will tell you that enough is enough.
The Fix: If your quad strength is an issue, focus on maintaining your setup position and gradually strengthen your quads with split squat variations to improve leg drive. Pulling the slack out of the bar while keeping your chest up and shoulders down will also create the tension necessary to fix this problem.
Rounding of Your Lower and Upper Back
There is a small number of elite competitive deadlifters who are the exception to the rule here, but you are probably not one of them. Rounding your upper or lower back increases the distance you have to pull the barbell to lockout, which makes the exercise harder than it needs to be. It also puts you at greater risk of injury by exposing your spine to more direct stress. It’s more efficient, more safe, and more stable to keep a neutral spine.
The Fix: Strong lats and a strong upper back are the keys here. When those muscles are adequately engaged — by squeezing your armpits together and putting your shoulder blades in your back pocket — it decreases the distance you have to pull the bar and keeps your spine neutral, which protects you from shearing and compressive forces.
Too Slow Off The Floor
Being slow off the floor and allowing your hips to rise too fast is a deadlift catch-22. You don’t want to come up too quickly, but you also don’t what to come up to slowly. When you’re slow off the floor, you spend too much energy during your initial pull, which saps your overall strength and makes a successful lockout less likely. Plus, it puts your lower back at greater risk of injury because that’s one of the more vulnerable positions of the lift.
The Fix: Build strength and power from the bottom position to blast past this sticking point. One way to do this is to program a period focused on deficit deadlifts (standing on an elevated platform) to improve your speed in the bottom position. Another surprisingly obvious issue could be that the weight is too heavy, so you may simply need to take some weight off the bar and build overall strength.
Overarching Your Lower Back at Lockout
Locking out your deadlift when you are fatigued is difficult, and some lifters finish the movement by using their lower back, not their glutes. Some lifters may care how they end their lift as long as they reach lockout, but their lower back certainly does. Over time, crushing your lower spine will catch up with any lifter.
The Fix: This is summed up in three words: Squeeze your glutes. When locking out, bring your hips forward, engage your glutes, and resist any temptation to lean your shoulder far back behind your hips. Your lower back will thank you.
Common Programming Mistakes
Programming is subjective because goals differ from person to person. The deadlift is a full-body lift that requires all of your energy and attention, and avoiding these common programming mistakes will keep you safe and strong.
It’s Not an Accessory Lift
Standing over a barbell and pulling it from the floor is a full-body experience. The barbell deadlift requires a ton of energy from your nervous system, as well as your muscles, and it’s always best trained early in your workout. If you squat and deadlift on the same day, perform the deadlift first.
The Fix: It is a fairly easy one. Without question, perform the deadlift after your warm-up, core work, or lightweight power training. Don’t approach the deadlift after you’ve fatigued your body with significant weight training for any other body parts.
Higher Rep Sets
Pulling from the floor is excellent for building strength and resilience, but it’s not the best deadlift variation for building muscle because it doesn’t focus tension on any one emphasized muscle — that belongs to the Romanian deadlift because you’re building eccentric and concentric strength.
Performing higher rep sets, 10 or more reps per set, with the barbell deadlift for building muscle or strength is not the best idea because once your muscles get tired, your chance for injury jumps higher.
The Fix: If you want to build strength and perform with a heavier weight for “higher reps,” achieve that training volume using every minute on the minute sets. With 85 to 90% of your one-rep max, perform one or two reps, rest the remainder of the minute, and do it again at the start of the next minute. Start with 10 minutes total and build up to 20 minutes. You’ll never look at “high-rep” deadlifts the same way again.
How to Deadlift
Time for a quick refresher on how to achieve a powerful and crisp conventional deadlift.
Step 1 — Lock In Your Stance
Approach the barbell with a hip-to-shoulder-width stance, with the barbell above your midfoot. Angle your feet out slightly.
Step 2 — Set Your Grip
With a soft bend in your knees, hinge down at your hips to grip the bar with your grip of choice (overhand, over/under, or hook grip). Keep your hands close to your body without getting in the way of your knees.
Step 3 — Think About Your Hips
Pull your chest up. Squeeze your armpits together and drive your shoulder blades down to get a neutral spine. This allows your hips to be slightly below your shoulders, where they should be for a safe and efficient pulling position.
Step 4 — Breathe and Brace
Engage your abs, upper back, and lats. Squeeze the bar and feel tension throughout your whole body while feeling a slight stretch in your hamstrings. Take a deep breath in and get ready to rip.
Step 5 — Pull
Imagine performing a leg press, driving the barbell away from the floor while extending your hips and knees, and raising your upper body. Think about standing tall and finishing with your glutes at lockout.
Grip it and Rip It
Mistakes are bound to happen when you push your deadlift boundaries. There is no such thing as a “perfect form,” but there is such thing as safe, efficient, and effective form. It pays to dot your I’s and cross your T’s whenever you’re standing over the bar ready to pull. Now that you know some common errors, you know what to watch for while getting stronger more safely. Time to grip it and rip it, baby.
Featured Image: PeopleImages.com – Yuri A / Shutterstock


