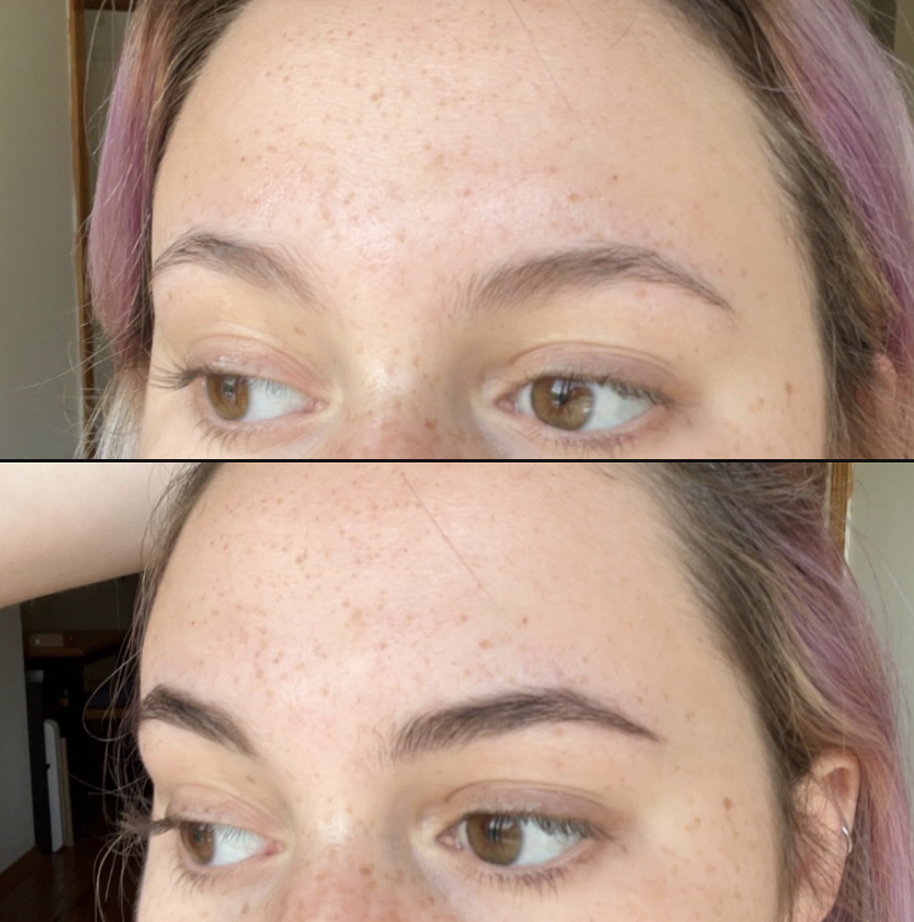
From mastering the art of the at-home manicure to facing our fear of dying our own hair, we found tons of innovative ways to maintain our beauty routines from home in light of the COVID-19 pandemic. Now, in an officially post-pandemic world, it seems many of these at-home rituals have started to fade. But there is one trend that I’ve continued to see all over my social media regardless of lockdown status: tinting your eyebrows with beard dye.
For what feels like years at this point, I’ve periodically stumbled across videos of people using Just for Men’s Beard Dye ($14) to achieve an at-home brow tint, and I’ve often been impressed. As someone who has relatively full brows but some irritating bald spots from years of over-plucking, I fill in my eyebrows every single day. The thought of having a solution that would keep my brows dark and full for a few weeks has always been tempting. But, everyone knows eyebrows can change your whole face, so the fear of dying them too dark or in the wrong shape was real. After a lot of research and TikTok doom-scrolling, I decided to take the plunge and try the trend for myself. These are my thoughts.

The Process
I ordered the light brown shade of dye. I have naturally dark brown hair but didn’t want to go too dark on the first try. If you’re looking to try this at home, I definitely recommend going a shade lighter than you think is necessary. If I had gone any darker the look would have been too stark. In terms of prep, I tweezed my brows to lock in their shape, and then applied Vaseline along the edges and between my brows. (I had seen too many videos where people didn’t prep their skin and ended up staining pretty significantly.)
I then took the plastic mixing dish provided in the kit and mixed equal parts developer and dye. (I’ll be honest, I didn’t measure very precisely, I just put two pea-sized drops of each onto the dish and mixed.) The kit comes with a brush that’s made for dying beards and mustaches, which is generally a much bigger area than eyebrows, so I opted to use a Q-tip for a more precise application. I applied the dye exactly where I would usually fill in my brows, paying closer attention to the sparser areas.
After applying, you only have to wait about five minutes before wiping the product off. However, many videos recommend wiping off the dye on the very inner parts of your brows after about a two minutes. This prevents a boxy look and helps maintain the natural gradient that brows have. After five minutes I wiped off the remaining product with a wet paper towel and a little bit of soap. I did go back in to touch up a particularly sparse area that didn’t take as much as I wanted it to, but overall the process was incredibly straightforward and stress-free.
The Results
The Bottom Line
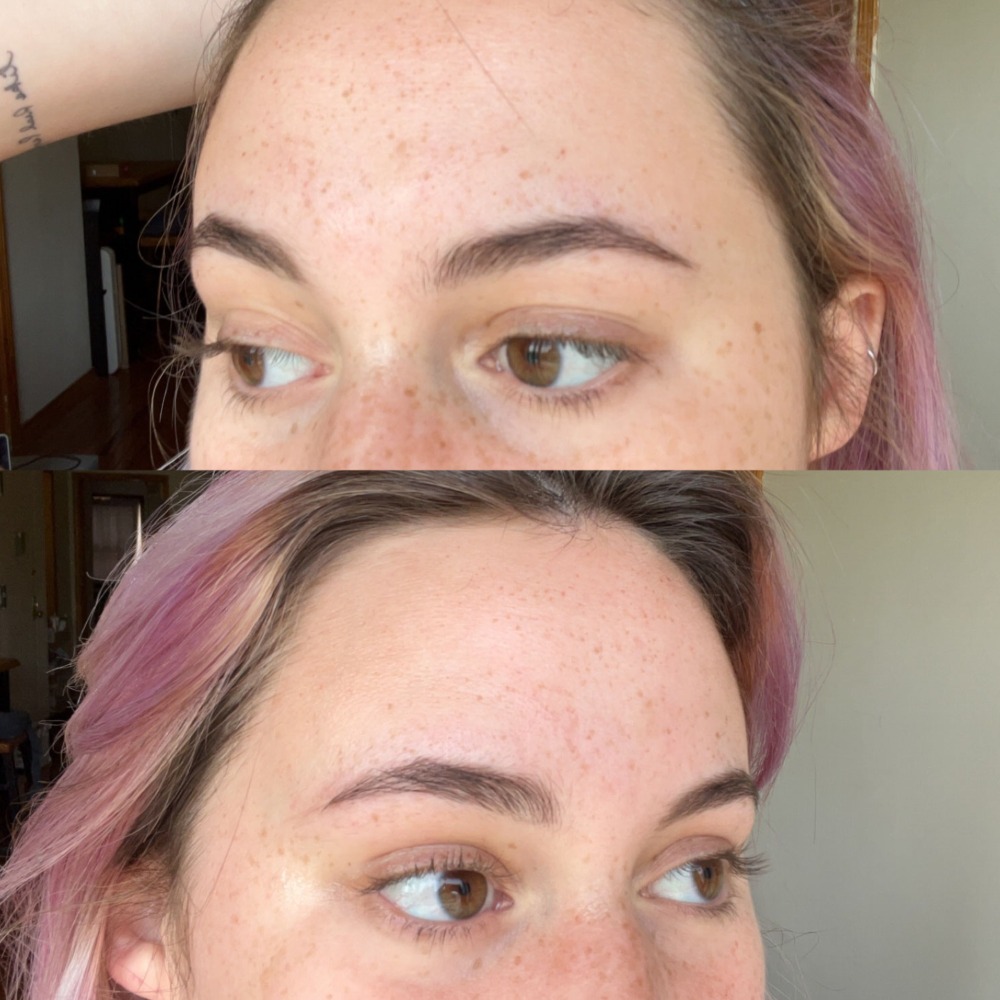
If you’re looking for a long-term solution to filling in your brows everyday, I recommend giving this hack a try. I was genuinely amazed with how significant the results are. As long as you’re careful with skin prep and application, you’ll be looking at salon-quality brows in no time.

